Creating Backend APIs for Android Apps with Heroku and Retrofit
This post walks you through the process of creating a backend server API for an Android app, running that API on Heroku, and invoking it from Android with Square Retrofit.
Creating the Server app
There are many server technologies you can choose from when building a backend API. But most Android developers prefer Java frameworks because it allows them to reuse all of their Java language knowledge, and even some of their favorite libraries.
I’ve set up three sample apps you can choose from. Each implements the same service using a different framework. Pick one, and deploy it by clicking the button below its description:
-
Spring Boot: Spring boot is an opinionated framework that favors convention over configuration. It’s designed to get you up and running as quickly as possible. However, it can be heavy handed at times. If your backend API also requires a traditional web view (with HTML, CSS, etc) this is a good choice. (code)
-
Ratpack: Ratpack is a microframework that provides just enough for writing practical, high performance, apps. It’s great for mobile apps because it favors the reactive programming model and includes integrations for RxJava and other great libraries. (code)
-
Wildfly Swarm: WildFly Swarm is a JavaEE server framework, but it packages your app with only the dependencies you need. This makes it much lighter-weight and flexible than traditional Java application servers. It’s great if you want to use JAX-RS. (code)
After you’ve finished the Heroku Button deployment, click the “View App” button to check that your service is up and running. Then make note of the URL, because you’ll use it in your Android app.
Creating an Android app
You can either begin by creating a new project in Android Studio or you can clone my sample application from Github. If you create a new app, choose a minimum API level of 18 and add an “Empty Activity” as the template.
Before your app can call any backing services, you’ll need to give it permission to access the internet. Open AndroidManifest.xml and add this tag before the <application> tag:
<uses-permission android:name="android.permission.INTERNET"/>
Now add the Retrofit dependency by adding this line to the dependencies section of the build.gradle (Module: app) file:
compile 'com.squareup.retrofit2:retrofit:2.1.0'
The Empty Activity template has a TextView, which you’ll use to display the response of your service invocation. But you’ll also need a button to initiate the service call. Add the following code the project’s activity_main.xml after the <TextView> element:
<Button
    android:text="Button"
    android:layout_width="wrap_content"
    android:layout_height="wrap_content"
    android:layout_below="@+id/textView"
    android:id="@+id/button" />
Now wire up the TextView and the Button in the MainActivity class by adding the following code to the end of the onCreate method in the MainActivity.java file:
final TextView textView = (TextView) findViewById(R.id.textView);
final Button button = (Button) findViewById(R.id.button);
Invoking a Service
Before you can invoke your backend API, you’ll need to create a class to represent the client interface to the service. Right-click on your primary package in Android Studio, then select “New -> Java Class” and create a new Interface called HerokuService:
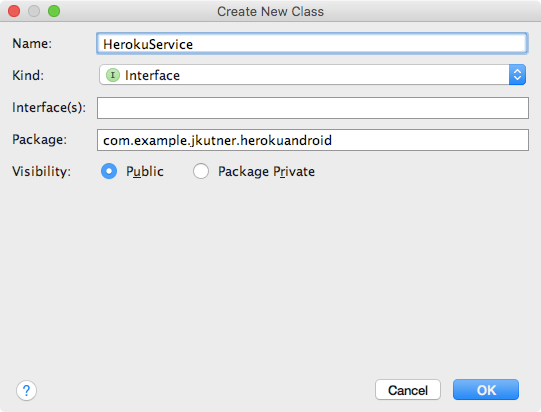
Then put the following code in the file:
import okhttp3.ResponseBody;
import retrofit2.Call;
import retrofit2.http.GET;
import retrofit2.http.Path;

public interface HerokuService {
    @GET("hello")
    Call<ResponseBody> hello();
}
Now you can use the class with Retrofit to make the service call. Return to the MainActivity class and add the following code to the end of the onCreate method:
Retrofit retrofit = new Retrofit.Builder()
    .baseUrl("https://<yourapp>.herokuapp.com/")
    .build();

final HerokuService service = retrofit.create(HerokuService.class);
In the URL string, replace <yourapp> with the name of the Heroku app you deployed earlier.
Now wire up the button so that clicking invokes your service by adding the following code next:
button.setOnClickListener(new View.OnClickListener() {
  @Override
  public void onClick(View v) {
    Call<ResponseBody> call = service.hello();
    call.enqueue(new Callback<ResponseBody>() {
      @Override
      public void onResponse(Call<ResponseBody> _,
                             Response<ResponseBody> response) {
        try {
          textView.setText(response.body().string());
        } catch (IOException e) {
          e.printStackTrace();
          textView.setText(e.getMessage());
        }
      }

      @Override
      public void onFailure(Call<ResponseBody> _, Throwable t) {
        t.printStackTrace();
        textView.setText(t.getMessage());
      }
    });
  }
});
This adds an OnClickListener to the button. When the button is clicked, it will run the onClick method of this anonymous class, which will in turn call service.hello().
But calling service.hello() does not immediately invoke the remote service. The Retrofit API is designed to be asynchronous, so it uses a Callback, which is similar in mechanics to the OnClickListener. The anonymous Callback gets the response from the service and updates the text in textView.
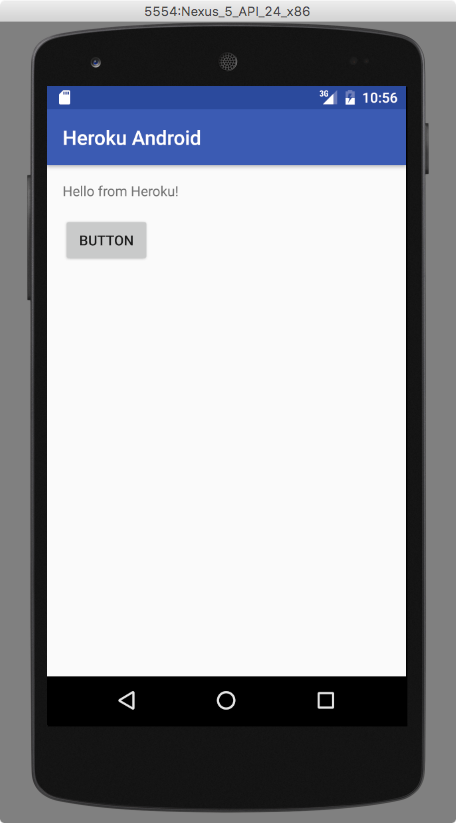
Run the app in your emulator or connected device and click the button. This is what you’ll see:
Next Steps
The simple service you deployed to Heroku doesn’t do much other than return a String. But backend APIs need business logic and very often a database. In the next post, you’ll learn how to provision a PostgreSQL database, and connect to it from your backend service. Then you’ll learn how to set up authentication so that your services are protected.